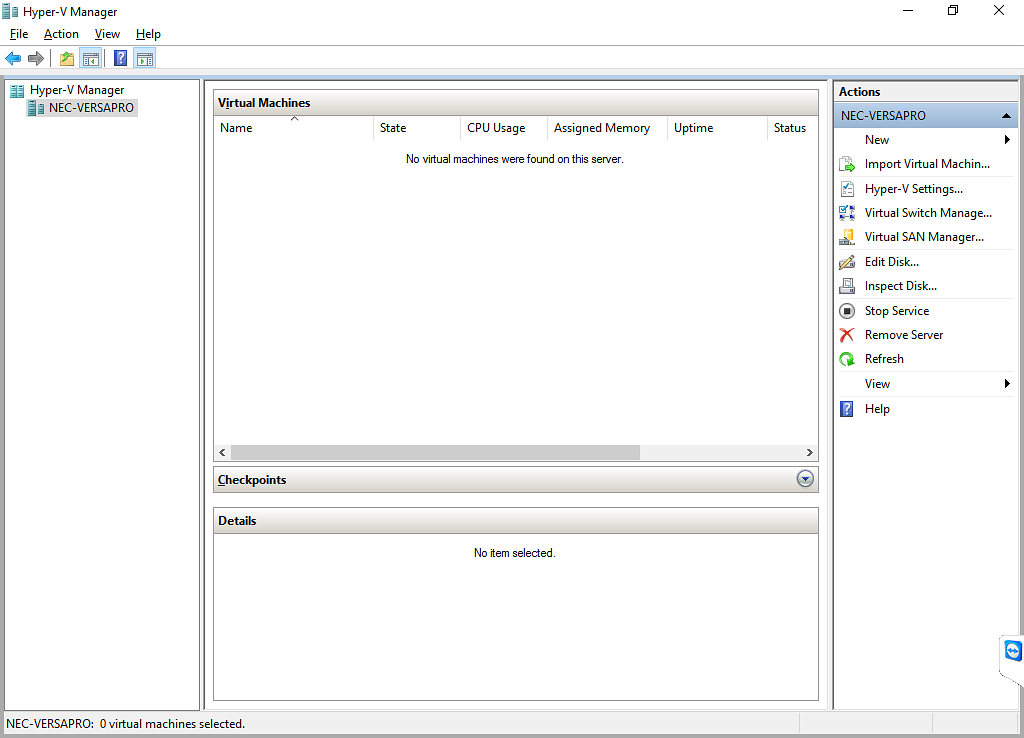
Microsoft Hyper-V Virtual Machine Install Guide
This is the Wanos install guide for Windows Hyper-V. Read and familiarize with the basics before deploying the appliance into production. This guide follows the Bridge deployment.
Table of Contents
Virtual Switch
Two virtual switches are required for one Wanos Appliance. WAN_Link and Server_LAN will be used as an example. These will be the bridged networks. For tunnel mode, one network is sufficient.
To get started, click Virtual Switch Manager found in the Actions Pane.
WAN_Link
Create a new virtual switch by selecting New virtual network switch under Virtual Switches. Choose External and click Create Virtual Switch.

Select External network and choose the appropriate LAN Adapter. Make sure to leave Allow management operating system to share this network adapter checkbox selected. Click the Apply button to commit the changes.
Server_LAN
The same steps outlined in WAN_Link can be used. Alternatively, administrators can use Internal, as the type of virtual switch, when connecting Wanos on the same host or in cases where the host only has one NIC and/or VLANs are used
Example: connecting to the physical LAN network:
Type of Virtual Switch: External
Name: Server_LAN
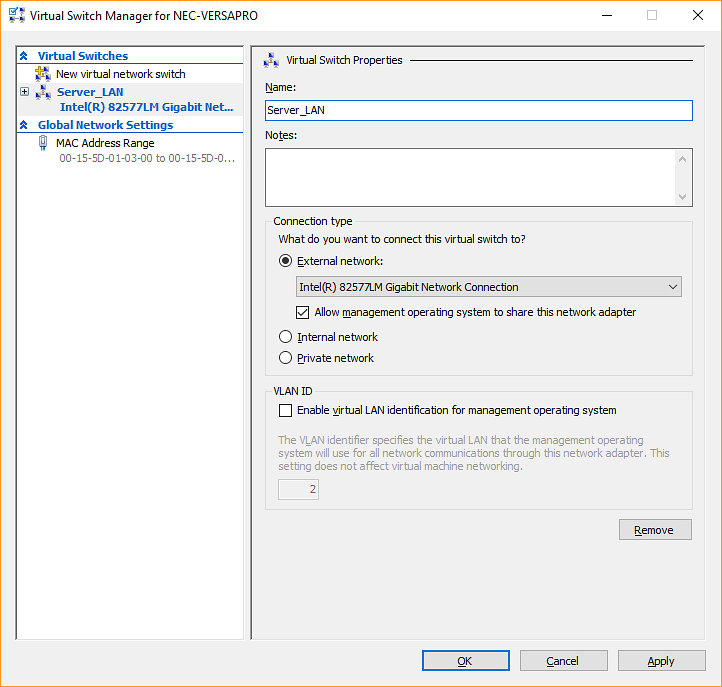
.
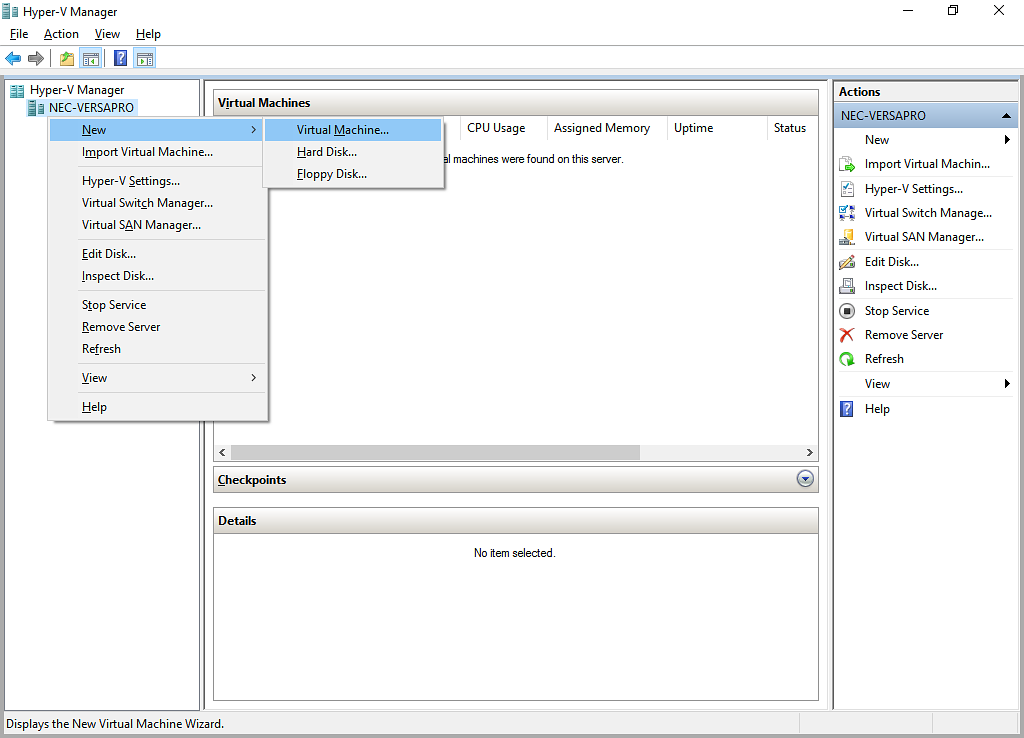
Import Wanos Appliance
Download the VHD version of Wanos from our website. Extract the file to a target directory (e.g. Downloads). At least two Wanos installations are required in a production environment.
To get started, select Action (or right click on the Server) > New > Virtual Machine on the Hyper-V Manager window.
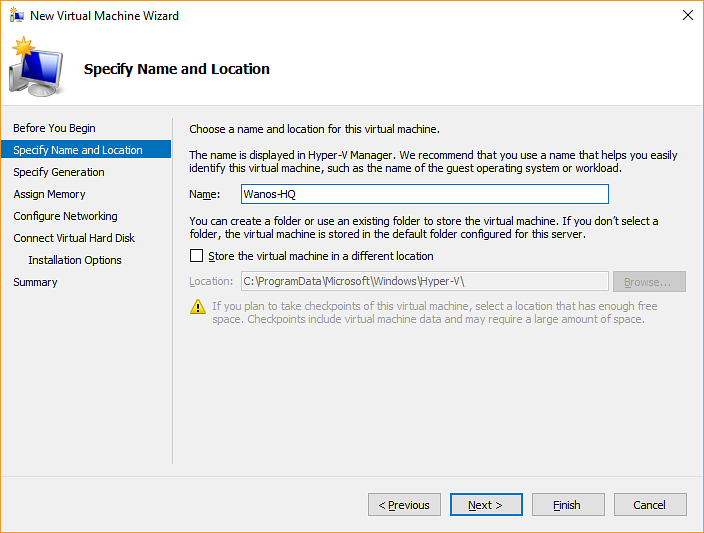
Wanos-HQ
Set the Name to Wanos-HQ. Click Next to continue.
Note: The admin can manually Store the virtual machine in a different location.
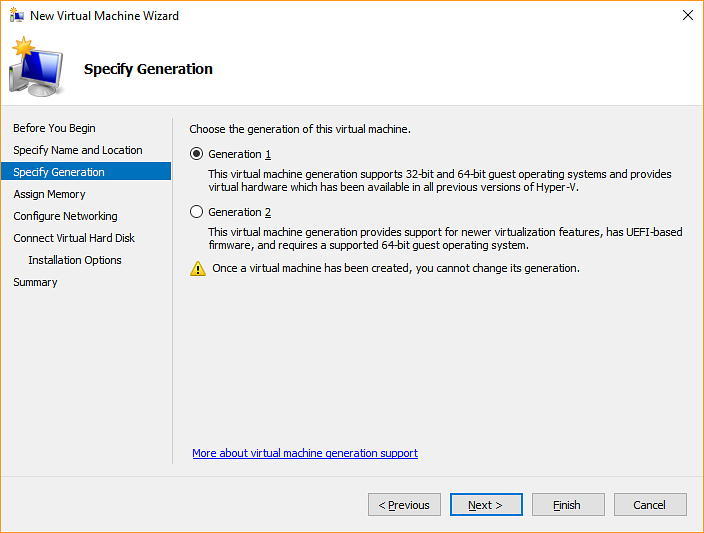
Leave the option selected under Generation 1. Click Next continue.
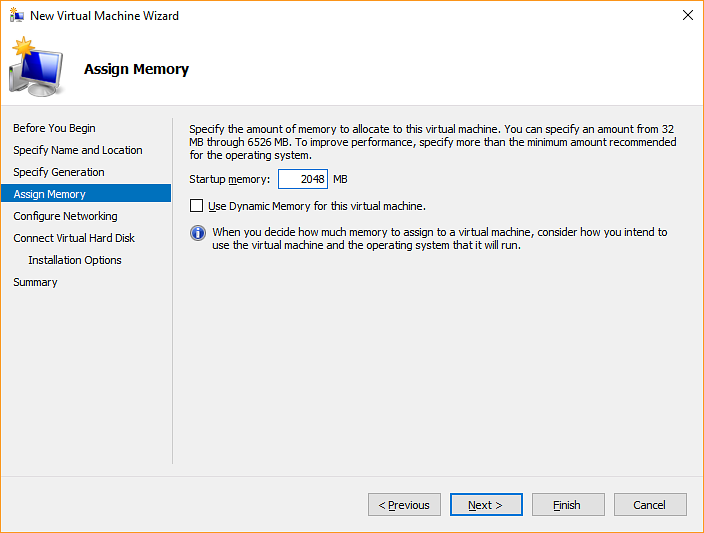
Set the Startup memory to 2048 MB and uncheck Use Dynamic Memory for this virtual machine. Click Next to continue.
Refer to the Hardware Requirements guide for more information.
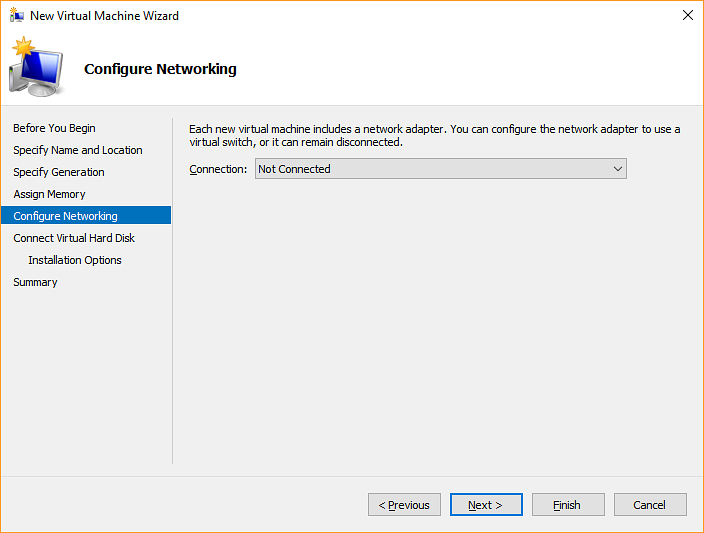
Leave Connection as Not Connected. Click Next to continue.
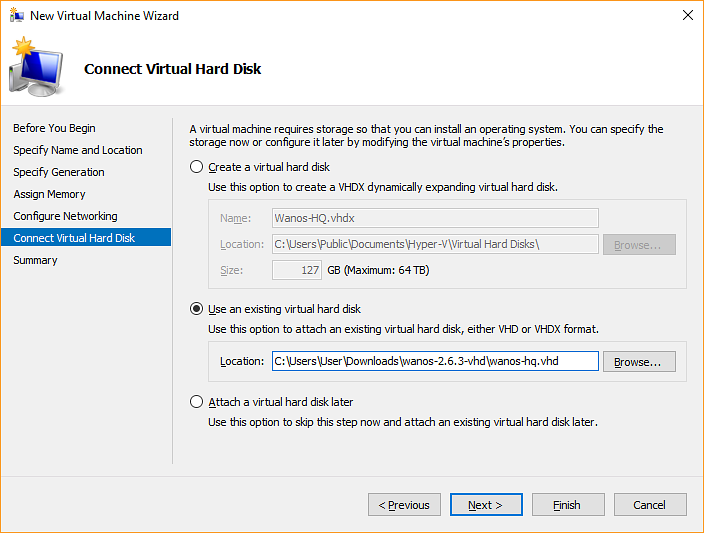
Choose Use an existing virtual hard disk, Click Browse to locate the extracted Wanos VHD file. Click Next to continue.
Click Finish.
Additional settings are required to configure the virtual machine. Select Wanos-HQ in the Virtual Machines list and click Settings.

Select Add Hardware and choose Network Adapter. Click the Add button.
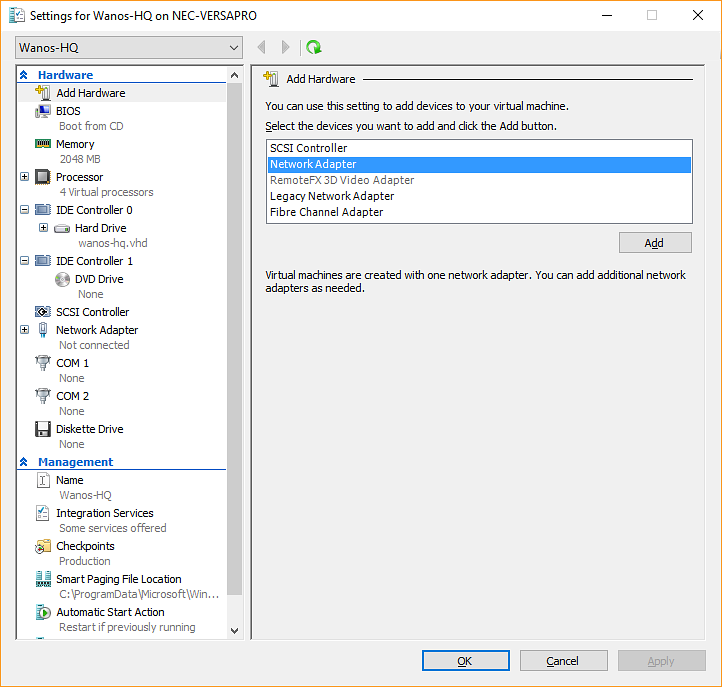
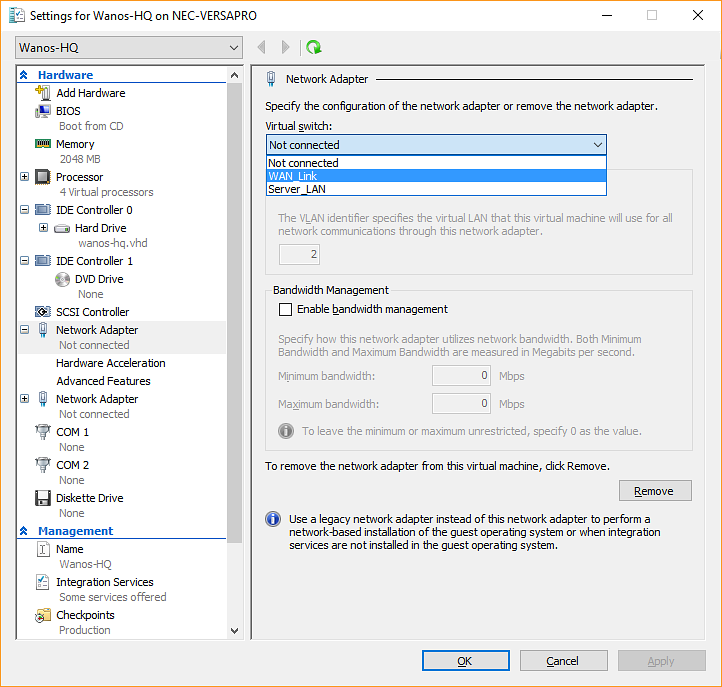
Select the first Network Adapter and set the Virtual switch to WAN_Link.
Click the Expand (+) button then select Advanced Features. Put a check mark under Enable MAC address spoofing.
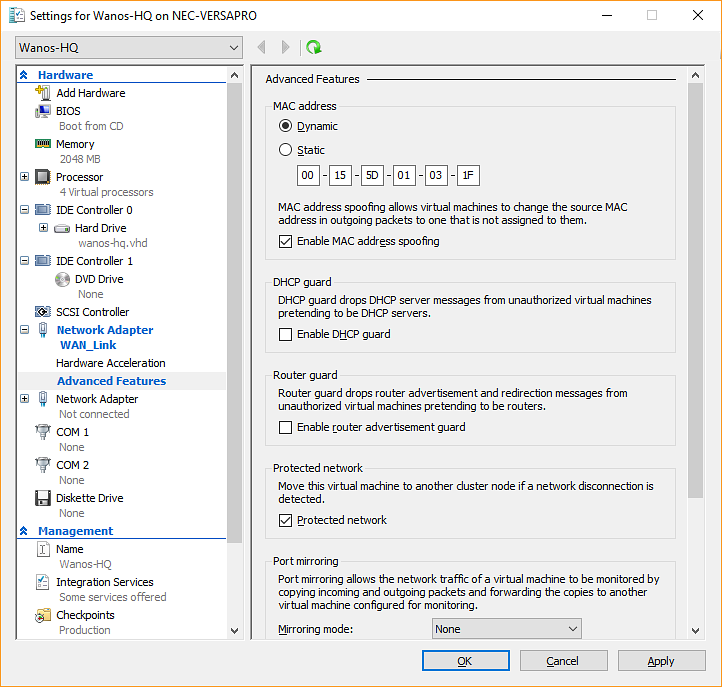
Select the second Network Adapter and choose Server_LAN as the Virtual Switch. Click the Expand (+) button, select Advanced Features and mark Enable MAC address spoofing. Click Apply then the OK button to save all the changes.
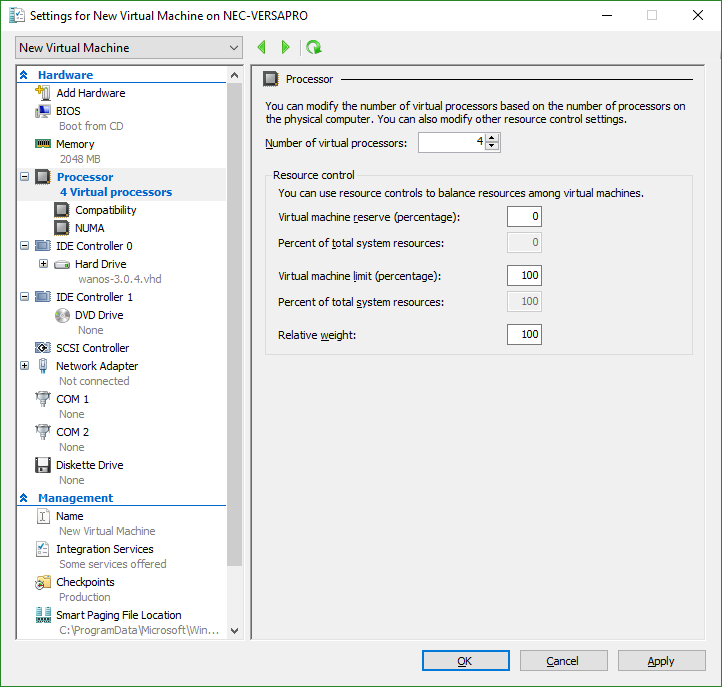
Set the number of CPUs as needed under Processor. The minimum required number of virtual processors for Wanos is two. Refer to the Hardware Requirements for more information.
Summary of steps
This section is the summary of what was configured.
Name: Wanos-HQ
Generation: Generation 1
Startup Memory: 2048 MB
Dynamic Memory: unchecked
Virtual Disk: Use an existing virtual hard disk
Add Hardware: Add Network Adapters (Avoid Legacy adapters)
Network Adapter Advanced Features: Enable MAC address spoofing
wan0 Connection: Connect wan0 to the router or firewall
lan0 Connection: Connect lan0 to the virtual or physical LAN
Processor: Four (4)
Follow the steps outlined in Wanos-HQ to deploy Wanos in other locations or offices. Adjust the parameters based on the deployment strategy across different sites.
IP Configuration
At this point, Wanos is installed and running.
Use a web browser to access the Web UI via https://192.168.1.200. If the network is on a different subnet, then, change the IP & Gateway information.
Once done, type the Username and Password to Login.
Update Software
Ensure to run the latest Wanos version. A step-by-step software update process guide is available.
License Activation
Unlock all Wanos features by activating a license. Please refer to the License Activation article. This step is also required for Trial use.
Username and Password
The login details for the Appliance and Web UI is in the Username and Password FAQ section.