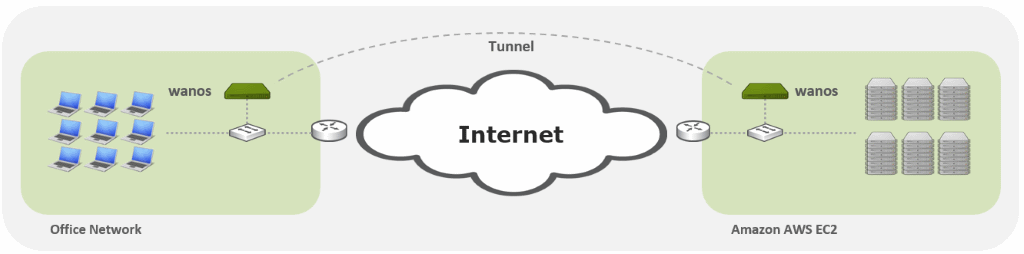
This is the Wanos install guide for AWS. Read and familiarize with the basics before deploying the appliance into production. This guide follows the Tunnel deployment.
Table of Contents (Click to jump into specific sections)
Remote-side or Branch-side setup
Assumptions:
- Wanos instances will peer on public addresses.
- No VPNs established between VPC and branch side peers.
Amazon AWS requirements:
- Elastic IP
- Security Group
- Add HTTP in Security Group for Non-Wanos AWS EC2 Instances that will serve Layer 7 applications.
Important Note:
This guide works on version 4 only. Always note to run an upgrade to the current version.
System Requirements:
Please review our Hardware Requirements and adjust it Amazon AWS EC2.
Deploy the AMI instance:
- Decide a zone where Wanos AMI will be deployed. Refer to Global Infrastructure for more information.
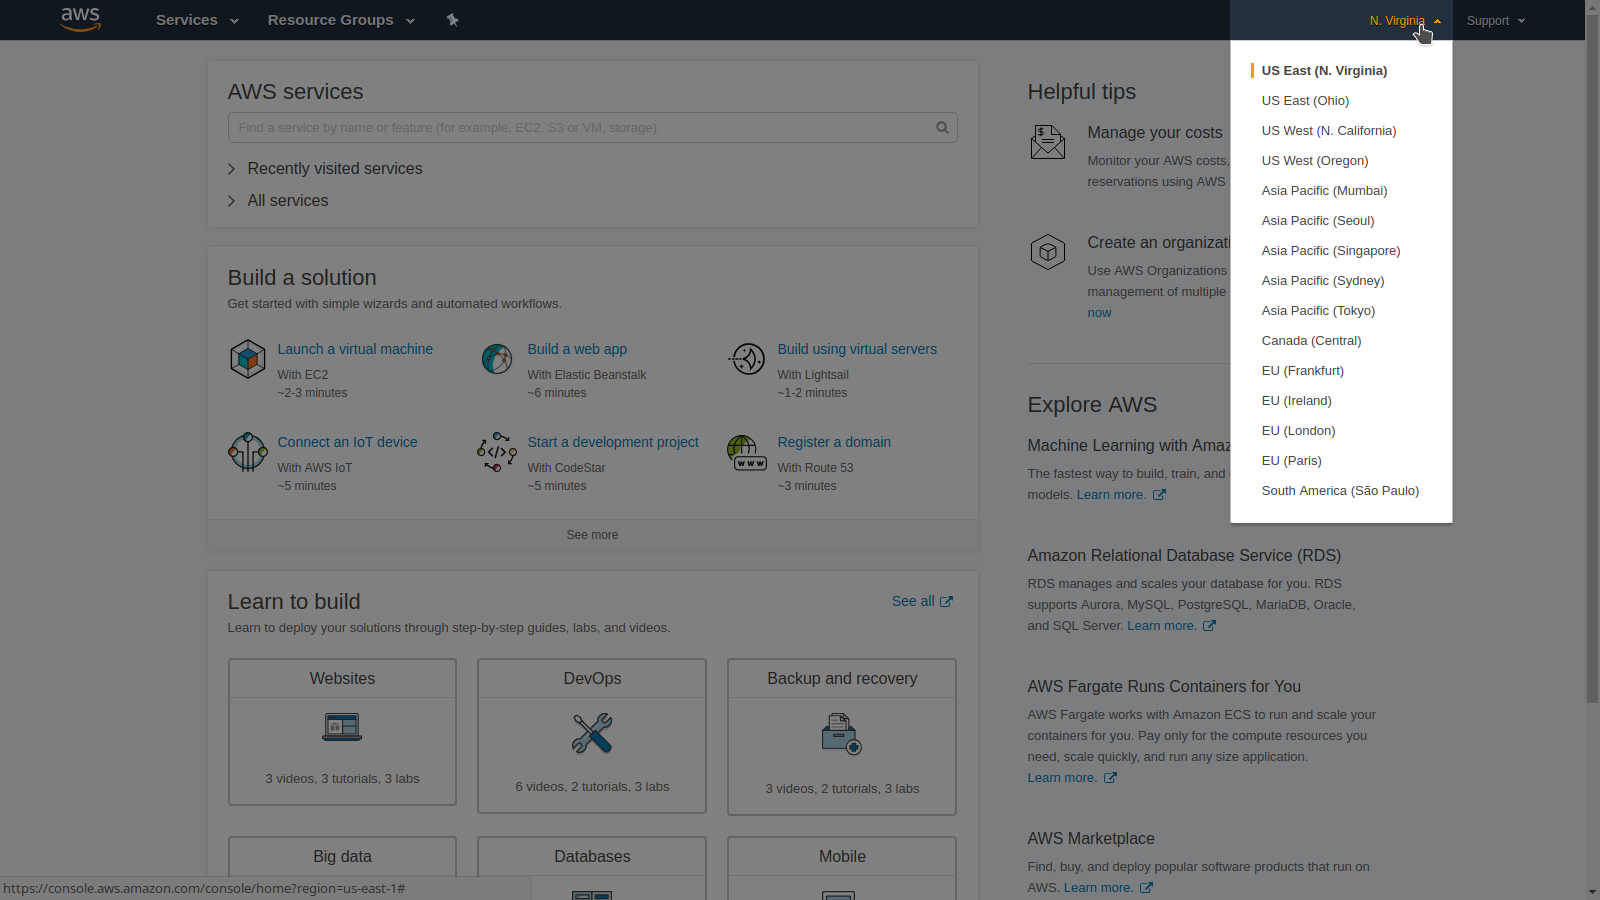
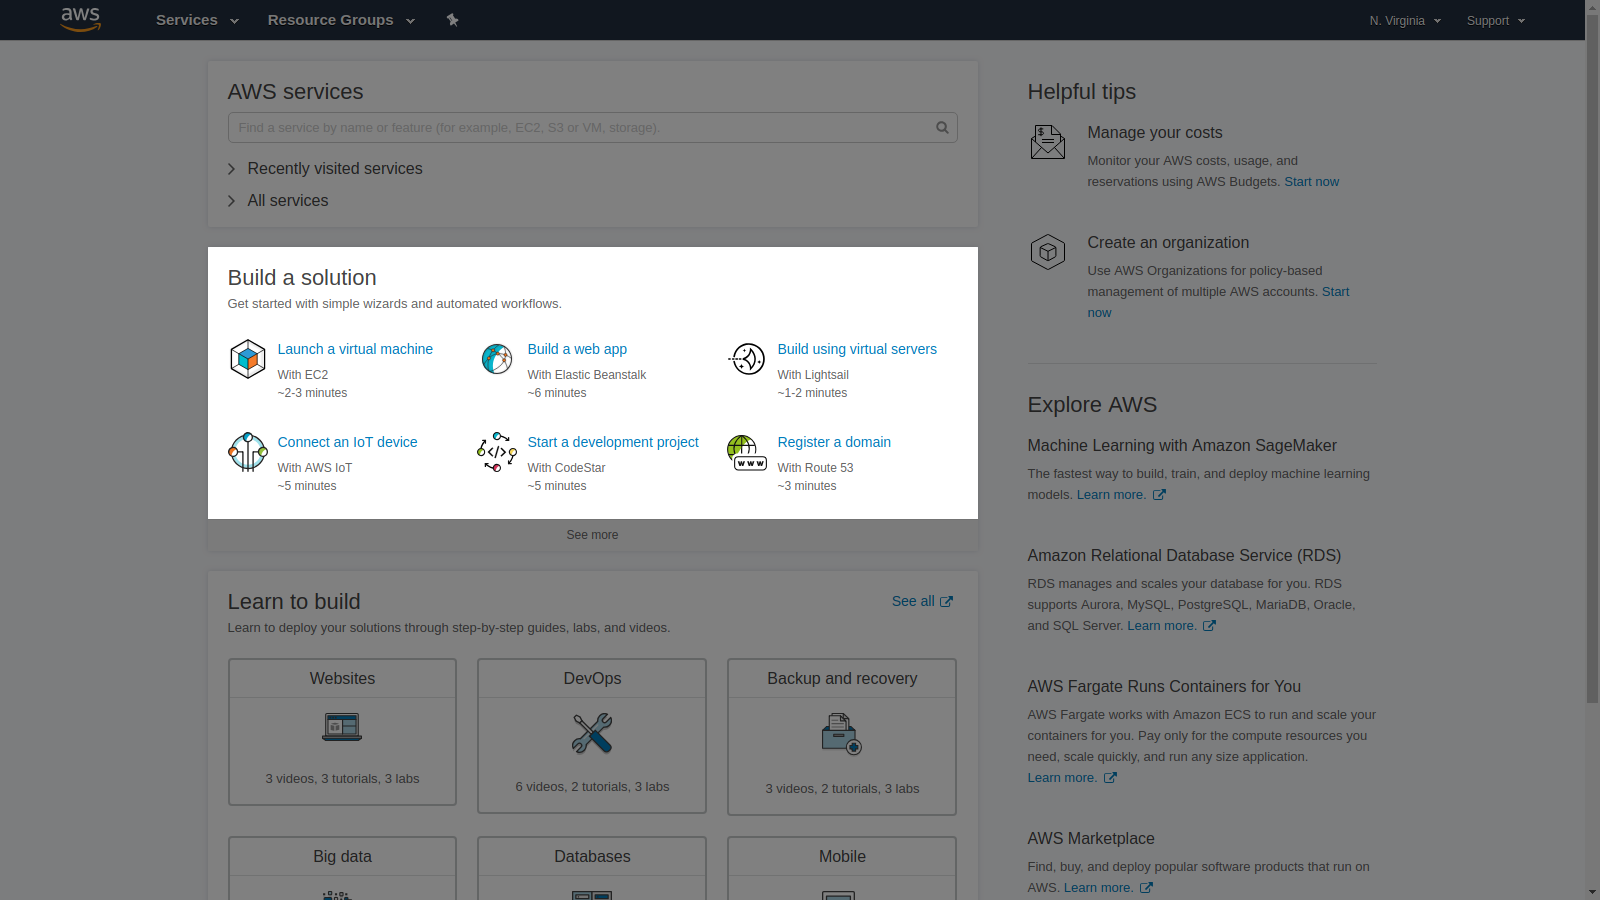
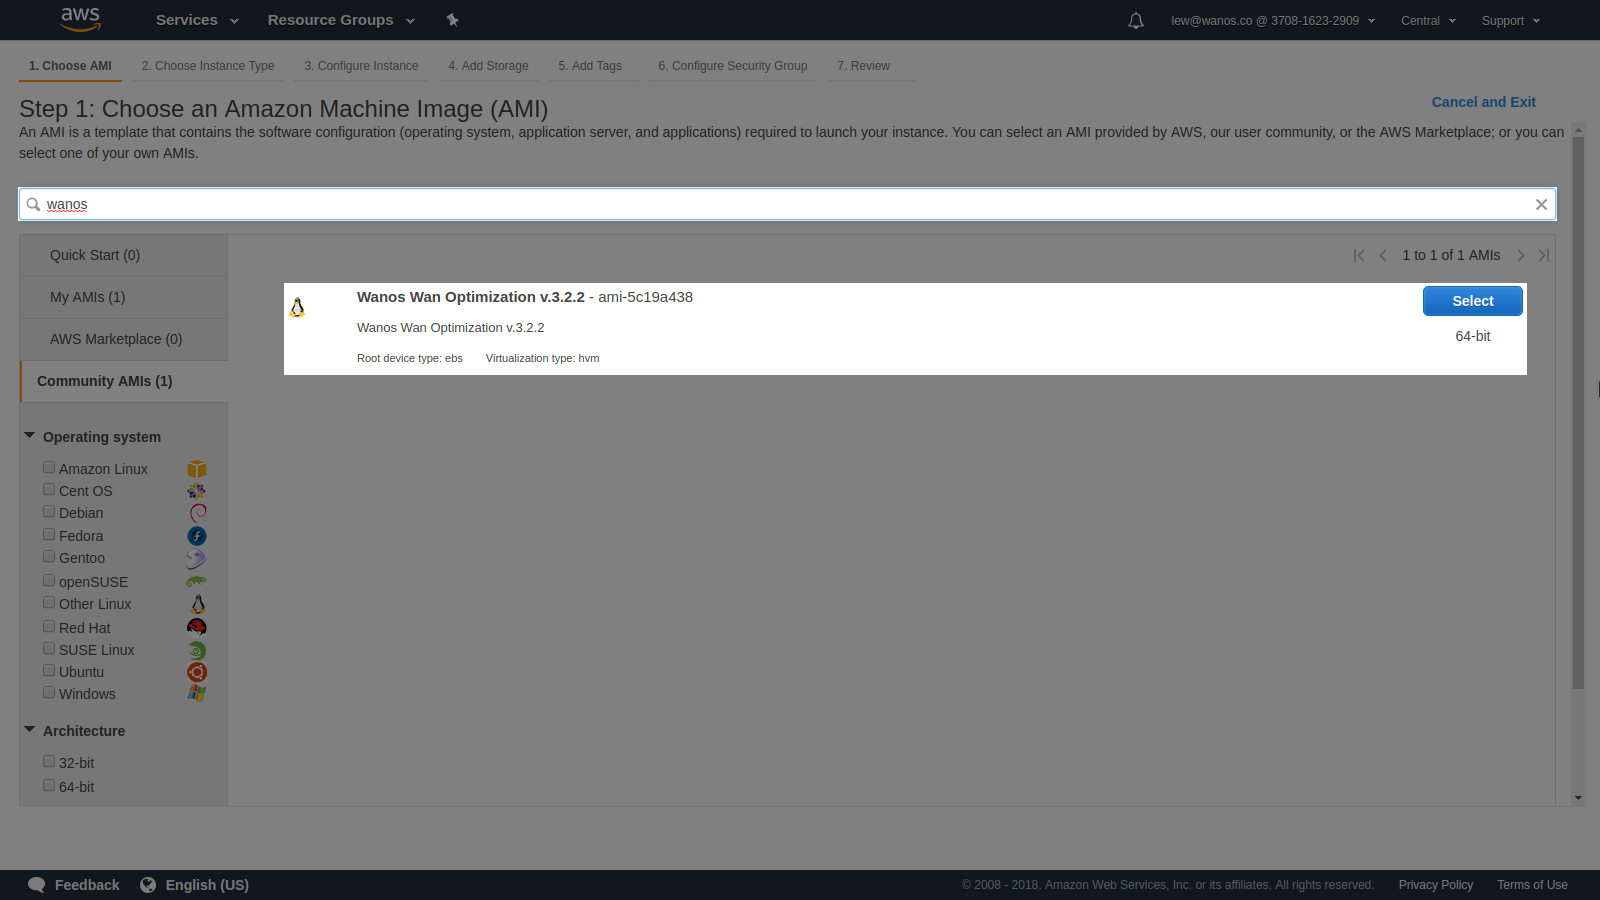
- Under Build a solution, select Launch a virtual machine. Search Wanos under Community AMIs. The instance can be copied to the preferred region.
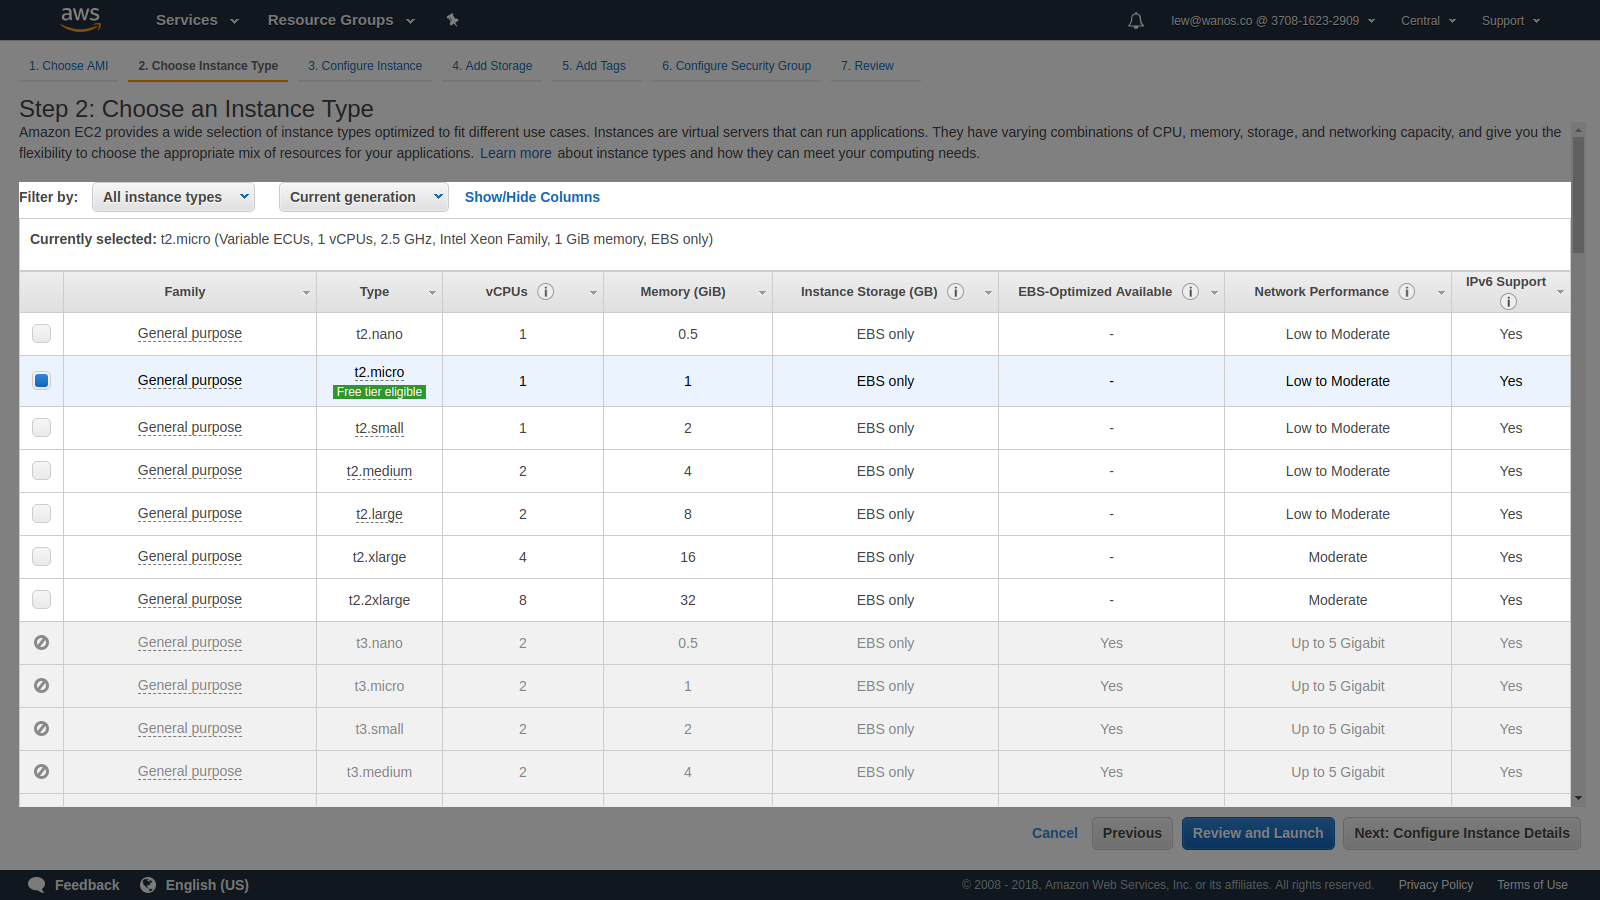
- Choose an Instance type. The type will depend on the requirements and complexity of the SD-WAN setup, Select t2.small for a lab setup. Check the AWS Simple Monthly Calculator tool to help manage costs.
- Configure the Instance. The defaults will work for a lab setup. The cloud administrator must know how to configure this section for production systems.
- Wanos uses 64 GiB of storage. Use Add New Volume to create large Datastores for production systems.

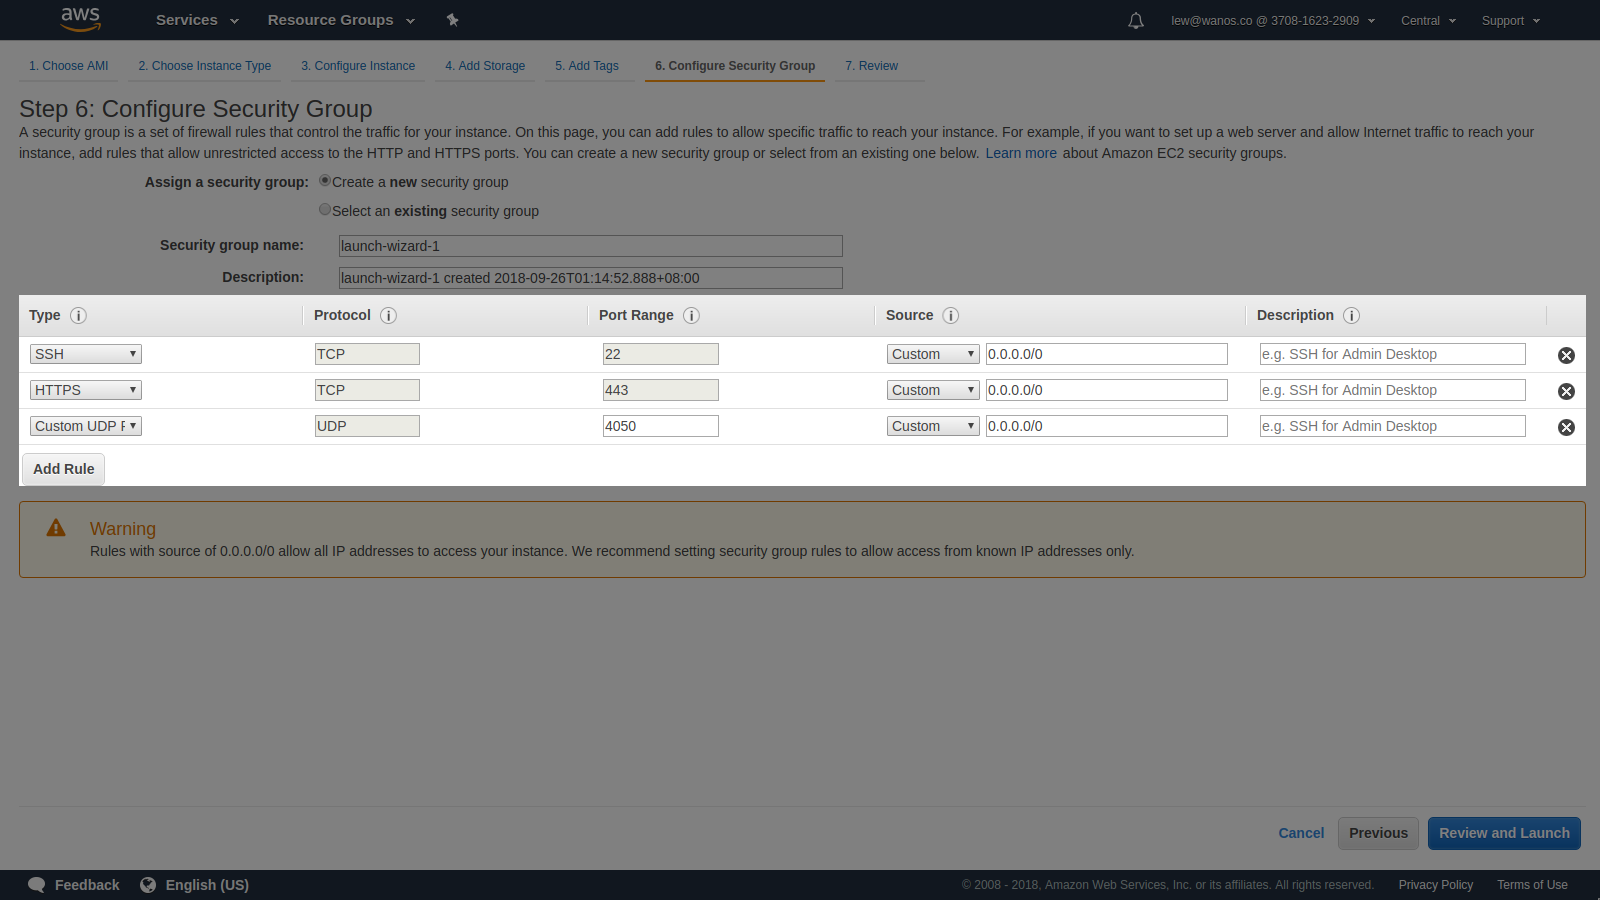
- The Security Group needs to be configured with the following information:
- SSH on port 22, HTTPS on port 443, Custom UDP port on 4050.
- Important note: Configure the Source field using the Public IP address of the remote target peer. Setting everything to 0.0.0.0/0 is a security risk.
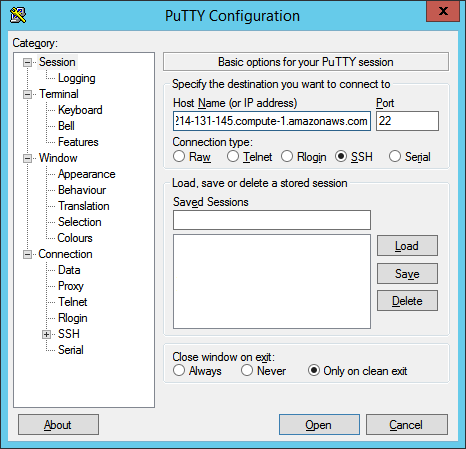
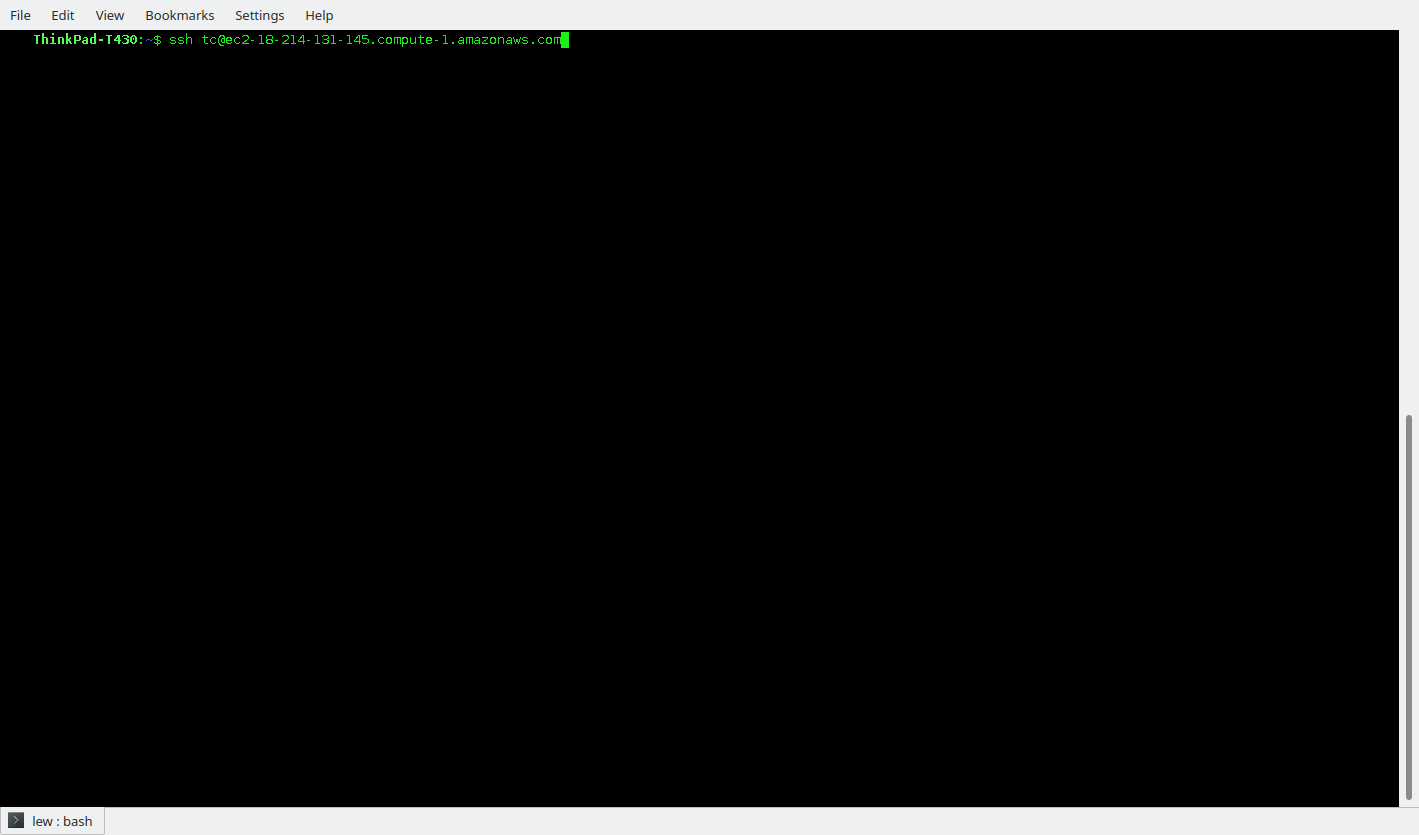
- The final section asks the user to set up a Key Pair. Wanos can work without Key Pairs. Use PuTTY (on Windows) or SSH directly into it on a Linux terminal using the Public DNS (IPv4) information. Please see Username and Password for login credentials. Shutdown the instance by using the command:
sudo poweroff
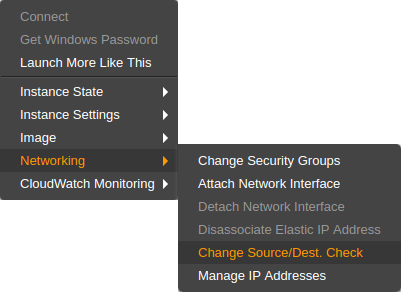
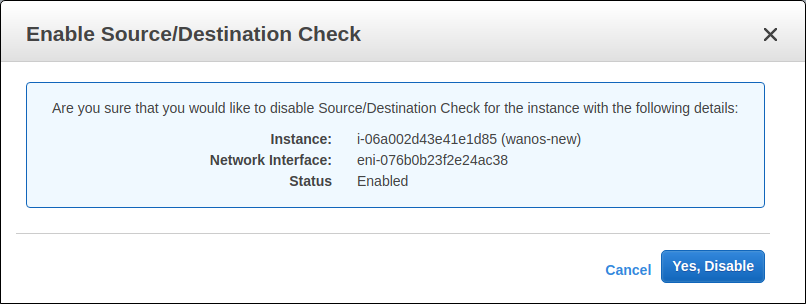
- Disable Source/Destination check.
- Assign an Elastic IP to it and start the instance. Amazon AWS has detailed information on Elastic IP Addresses.
- Start the Wanos EC2 Instance. Wanos Web UI should be accessible on your browser by navigating to:
https://<Elastic IP Address>
Example: https://18.214.131.145
Refer to the Username and Password for login information.
Update Software
Ensure to run the latest Wanos version. A step-by-step software update process guide is available.
License Activation
Unlock all Wanos features by activating a license. Please refer to the License Activation article. This step is also required for Trial use.
Username and Password
The login details for the Appliance and Web UI is in the Username and Password FAQ section.
Tunnel Setup
Deploying Wanos on an AWS EC2 Instance requires Tunnel Mode. Users need to access Web UI at this point.
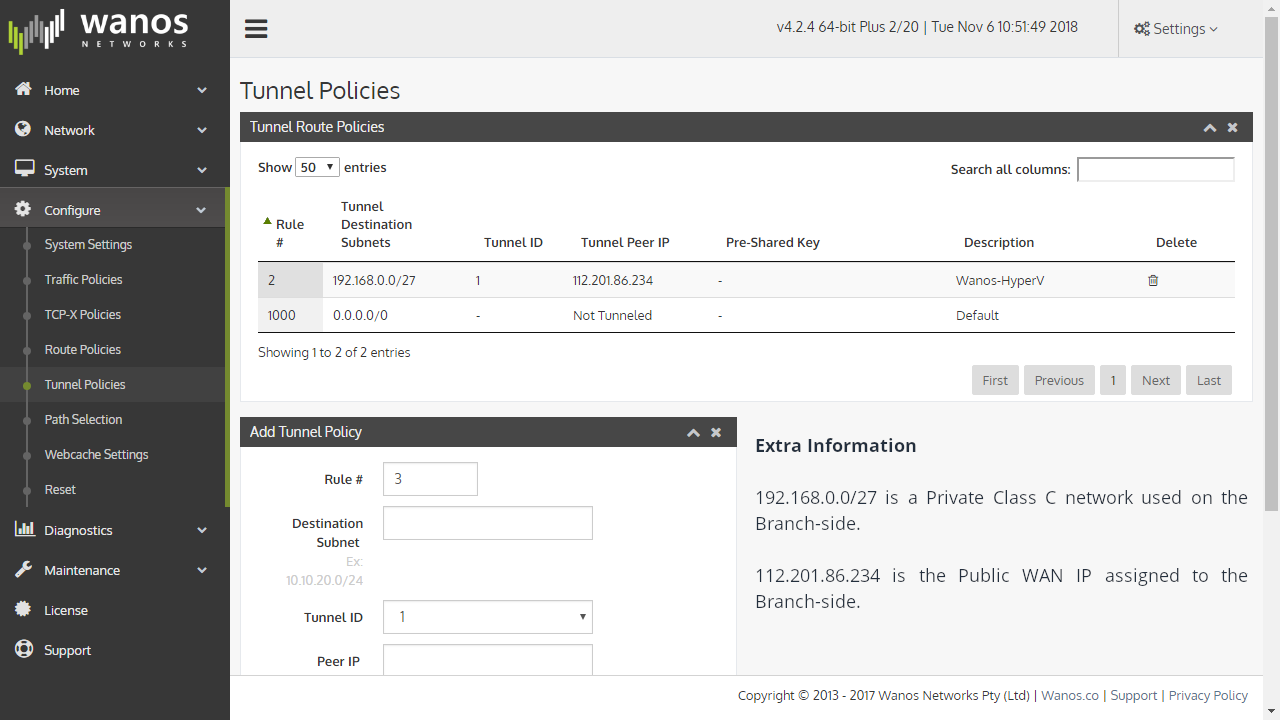
- Navigate to Configure > Tunnel Policies and fill out the fields:
Rule#: Identifying rule number (each rule should be unique).
Destination Subnet: The target private network subnet and its mask (e.g. 192.168.0.0/27)
Tunnel ID: The ability to link multiple subnets under the same or different tunnel IDs.
Peer IP: The (Public or Elastic) IP address of the target remote Peer (e.g. 112.201.86.234).
Description (Optional): Name of target Peer (e.g. Wanos-HyperV)
Note: Add as many rules as required. Tunnel Destination Subnets are private addresses while a Peer IP is a Public IP (or Elastic IP if the target peer comes from another AWS EC2 instance). Group these rules by using Tunnel ID with a new, existing or none (excluded) parameters.
Save to apply the settings. Navigate to Configure > System Settings and set the following:
Deployment Mode: Tunnel
Encapsulation: UDP
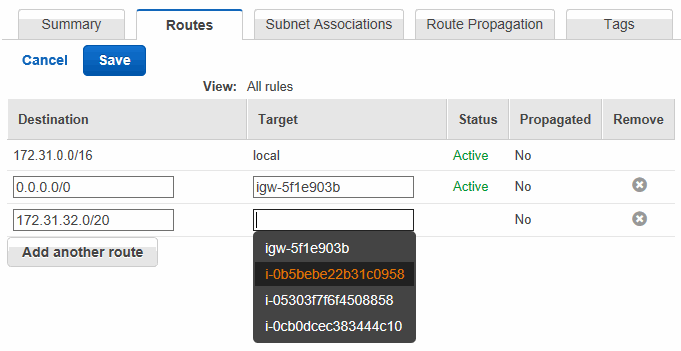
- Set up a VPC to route traffic of all Instances over the tunnel for the branch subnets. More information can be found on Amazon VPC.
Note: Test the peering between the AWS instances and the remote target peer machines before setting up a VPC route. Utilize the Linux and Windows route command after completing Remote-side or Branch-side setup.
Remote-side or Branch-side setup
- Follow the guides presented on the Installation section that suits your environment.
- Configure the Tunnel mode to match the network information on EC2 Wanos Instance.
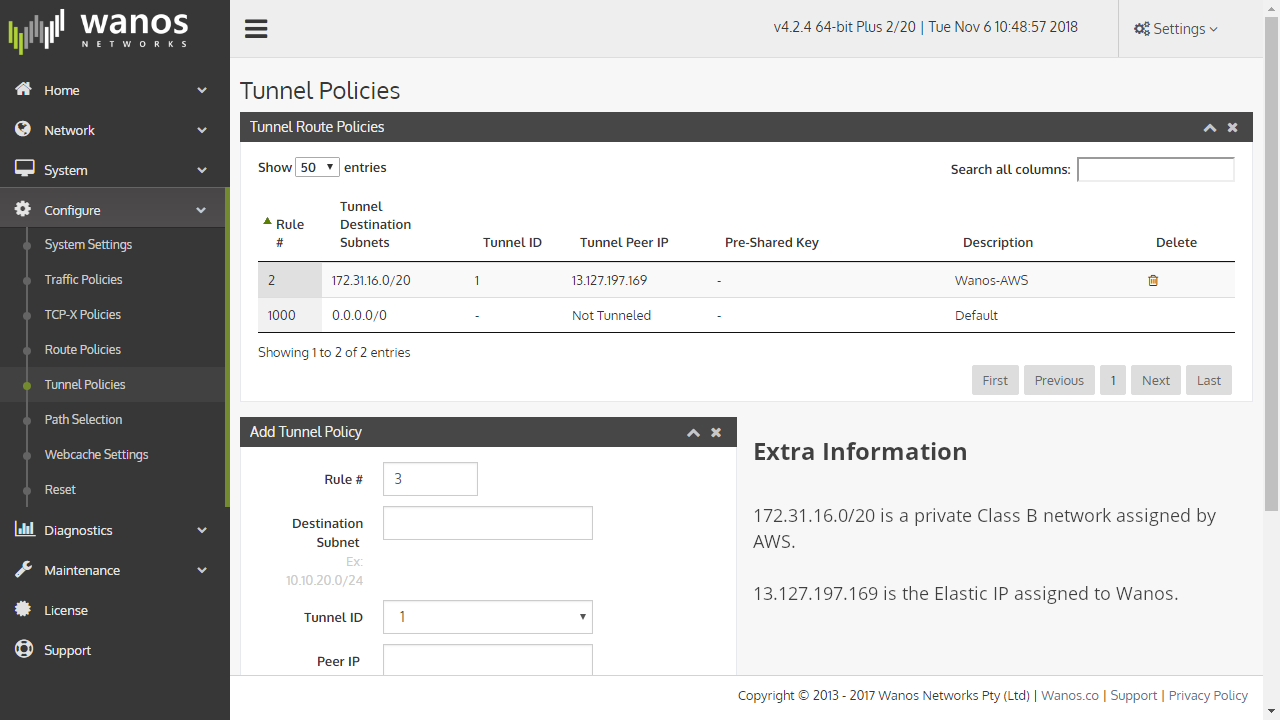
Example Tunnel configuration on the Branch-side:
Tunnel Destination Subnets: 172.31.16.020
Tunnel ID: 1
Tunnel Peer IP: 13.127.197.169 (Elastic IP)
Description: Wanos-AWS
The Tunnel Destination Subnets is the Private IP range allocated to the AWS account. Tunnel ID allows the identification and peering of the network between the main-site and branch-side. Tunnel Peer IP is the Elastic IP assigned to the AWS EC2 Wanos instance.
A video guide is available.