ESXi vSphere Virtual Machine Install Guide
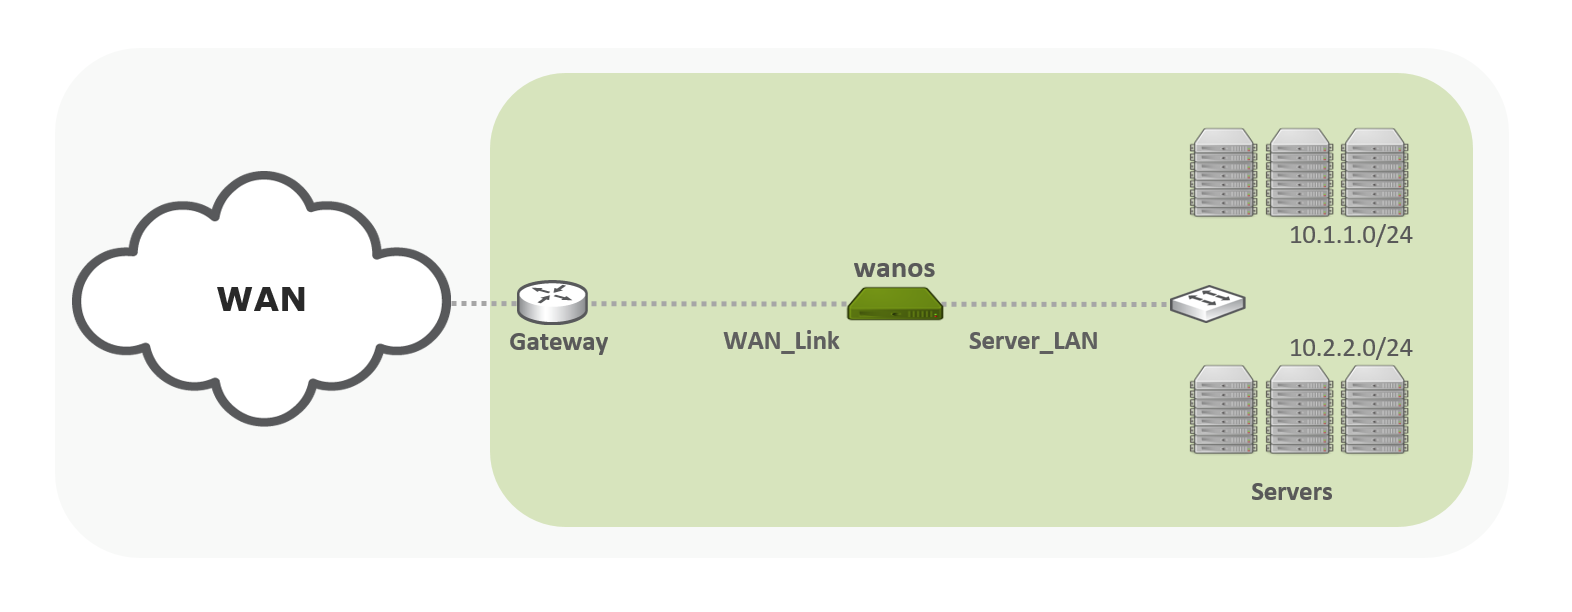
This is the Wanos install guide for VMWare ESXi. Read and familiarize with the basics before deploying the appliance into production. This guide follows the Bridge deployment.
Table of Contents
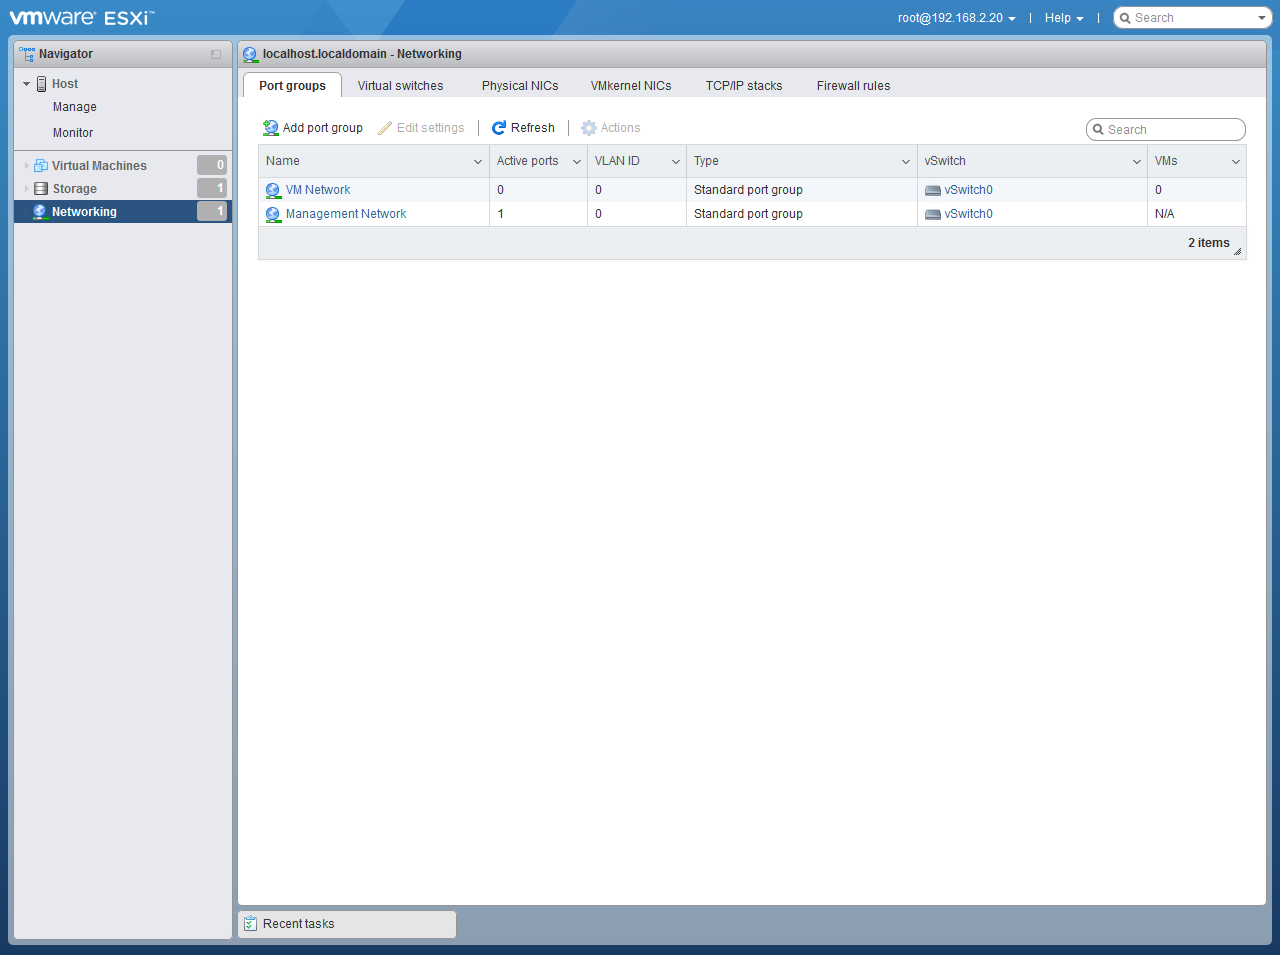
Configure ESXi vSwitch
Configure the vSwitch before installing Wanos. Create as many vSwitches and Port Groups as required. The steps are based on a Bridge deployment which is the default used by Wanos. A vSphere vSwitch guide has been created to tackle ESXi-specific settings. Two Port Groups will be created based in this bridge mode setup guide. A single Port Group is sufficient for Tunnel mode.
WAN_Link (Is assigned on the wan side of Wanos)
Server_LAN (Is assigned on the lan side Wanos).
To get started, Log into the ESXi vSphere Web User Interface. Under Navigator, click Networking > Port Groups > Add port group.
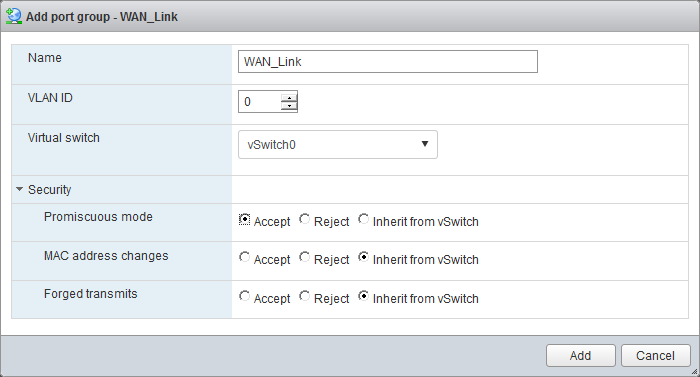
WAN_Link
Populate the following fields, as listed below, and click Add when done.
Name: WAN_Link
VLAN ID: 0
Virtual Switch: vSwitch0 (or a custom vSwitch dependent that suits your satisfies your own network requirements)
Security: Change Promiscuous mode from Inherit from vSwitch to Accept.
Security: Change Forged Transmits to Accept if Reject is inherited.
Server_LAN
The same steps outlined from Configure ESXi vSwitch to WAN_Link may be used. Use the following fields, as listed below, and click Add when done.
Name: Server_LAN
VLAN ID: 1
Virtual Switch: vSwitch0 (or a custom vSwitch dependent that suits your satisfies your own network requirements)
Security: Change Promiscuous mode from Inherit from vSwitch to Accept.
Security: Change Forged Transmits to Accept if Reject is inherited.
Deploy Wanos Appliance
Download the OVA version of Wanos from our website. Extract the file to a target directory (e.g. Downloads). At least two Wanos installations are required in a production environment.
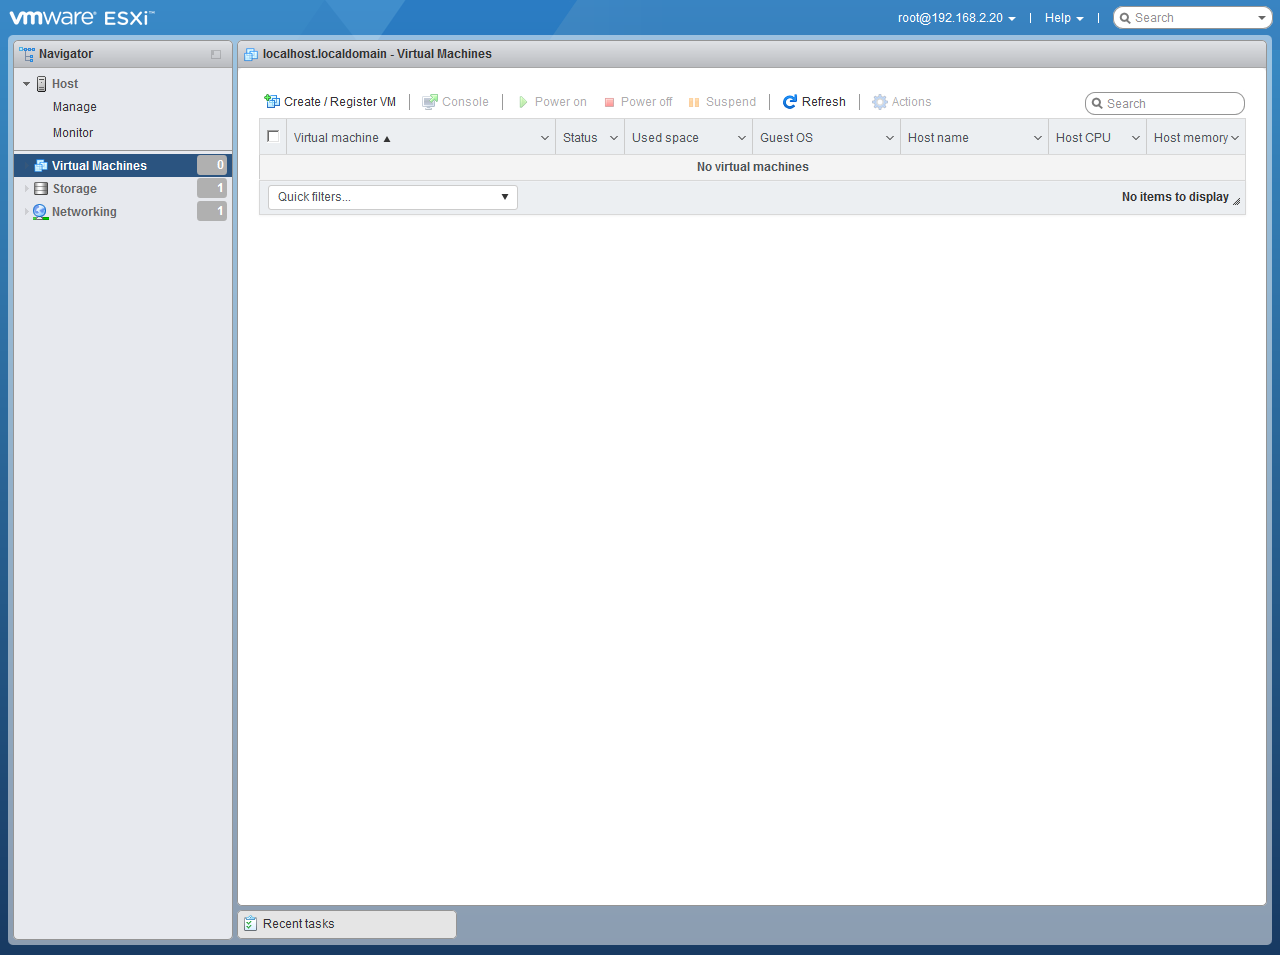
To get started, login to vSphere Hypervisor Web UI > Navigator > Virtual Machines > Create / Register VM
Deploy Wanos-HQ
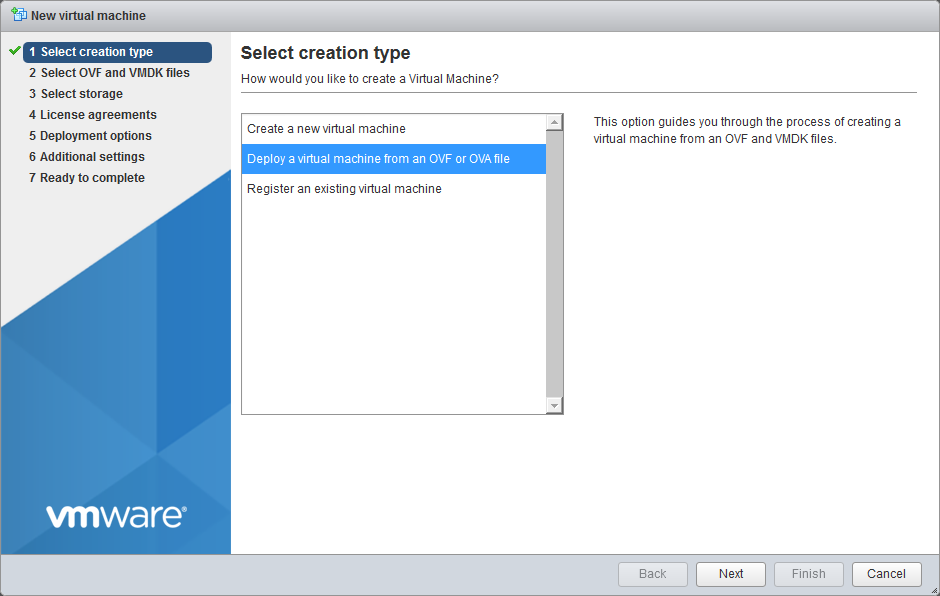
A New virtual machine wizard will appear. Select Deploy a virtual machine from an OVF or OVA file and click Next.
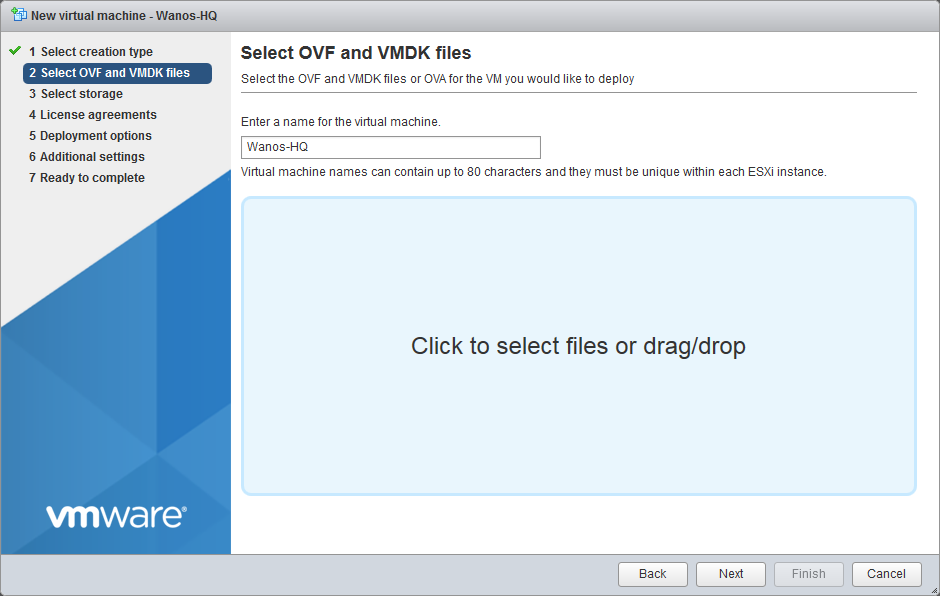
Set Wanos-HQ in the Enter a name for the virtual machine text field and either drag or browse the extracted OVF and VMDK files into the file box. Click Next.
Select the target datastore and click Next.

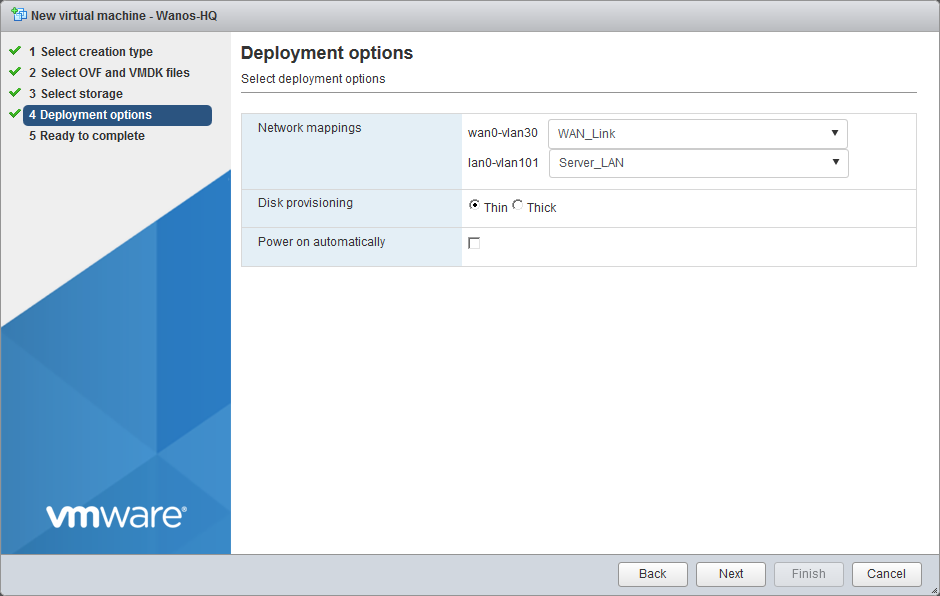
Under Deployment options, set the following parameters; Click Next after the parameters are set.
Network mappings: wan0vlan39 – WAN_Link, lan0vlan101 – Server_LAN
Disk provisioning: Thick (recommended)
Power on automatically: remove the checkmark or disable it
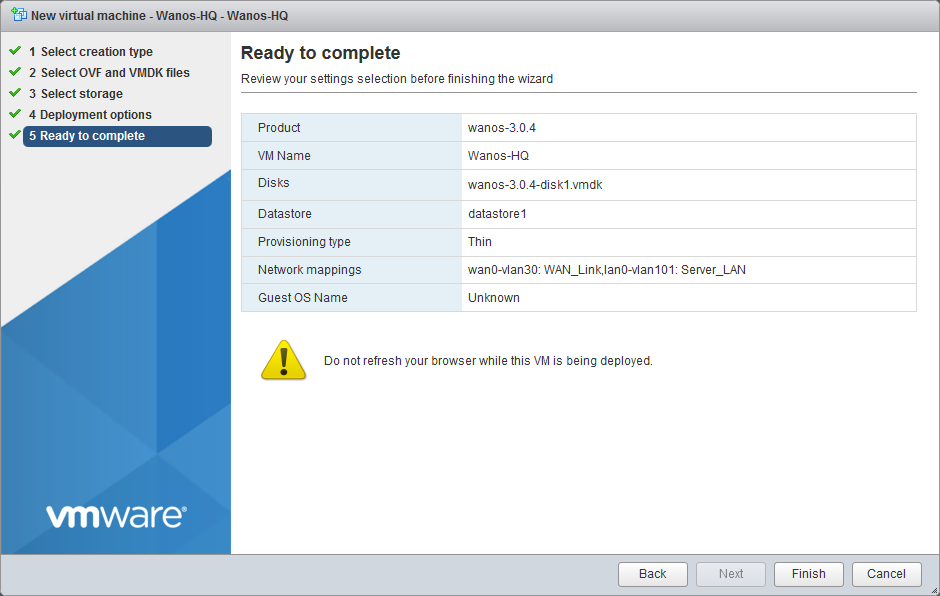
Review all parameters and click Finish when ready. Monitor the import progress in Recent tasks.
Follow the steps outlined in Deploy Wanos-HQ to deploy Wanos in other locations or offices. Adjust the parameters based on the deployment strategy across different sites.
Configure Virtual Machine
There are some important parameters that needs to be set before running the newly-created virtual machine. Refer and review the Hardware Requirements for more information:
To get started, go to Navigator > Virtual Machines select the target VM, in this case Wanos-HQ, then click Actions > Edit Settings.

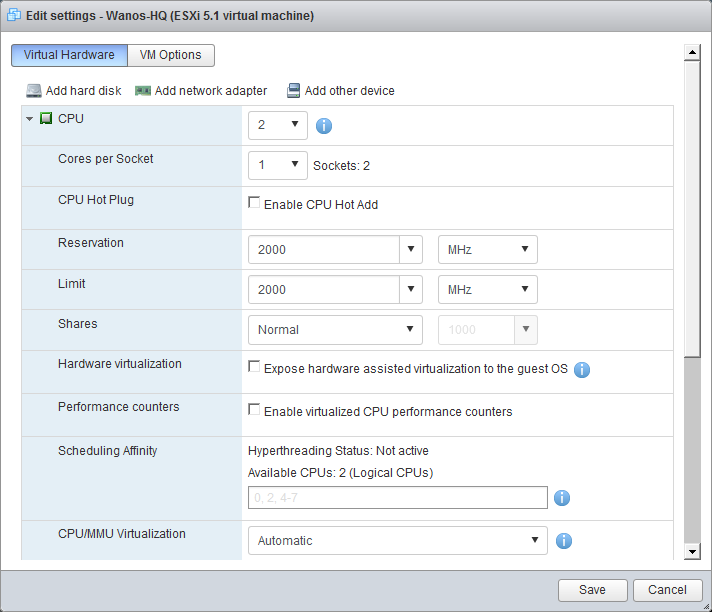
Under CPU, set the correct parameters as recommended in the Hardware Requirements. In the sample screenshot, CPU was set to 2; CPU Hot Plug was disabled; Reservation and Limit was set to 2000 MHz or 2GHz.
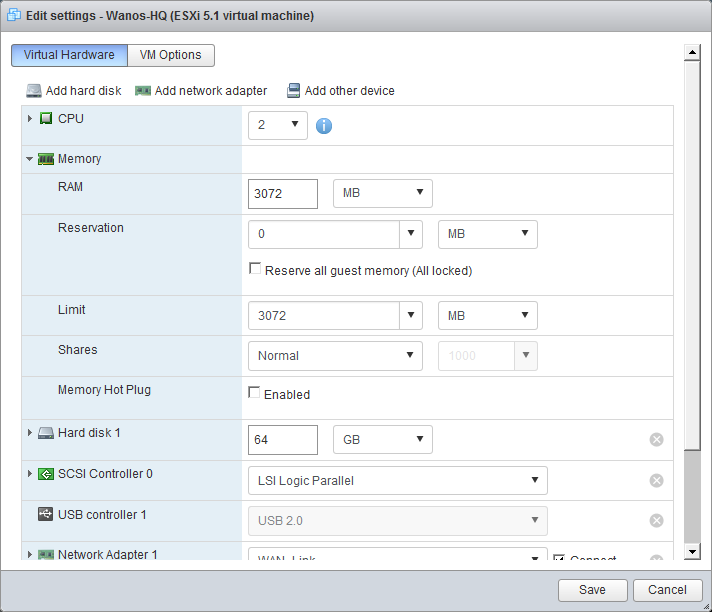
Under Memory, set the correct parameters as recommended in the Hardware Requirements. In the sample screenshot, Memory Reservation was set to 0; Limit was set to 3072 MB and Memory Hot Plug was disabled.
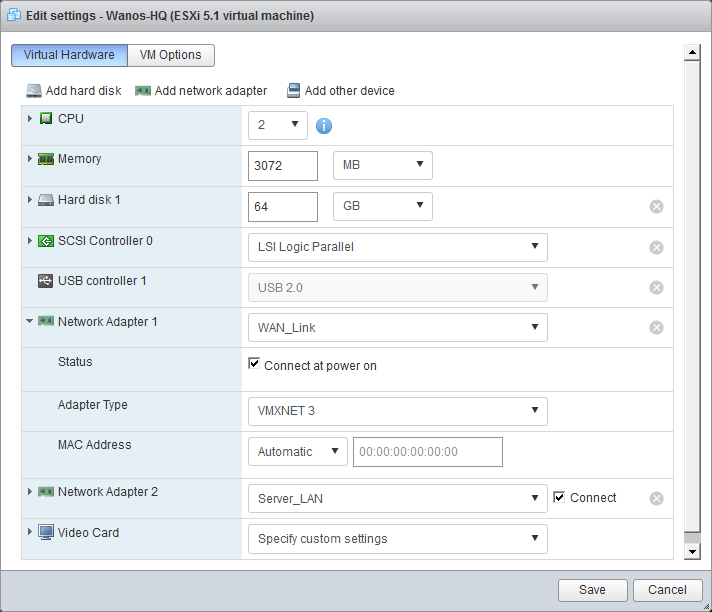
Administrators can double check if the network adapters are properly set. The recommended Settings are:
Adapter Type: VMXNET3
Network Adapter 1: wan0 side of Wanos
Network Adapter 2: lan0 side of Wanos
Based on the screenshot, Network 1 has the following:
Network Adapter 1: WAN_Link
Adapter Type: VMXNET 3
MAC Address: Automatic (administrators can assign a fixed MAC ID if required and if necessary)
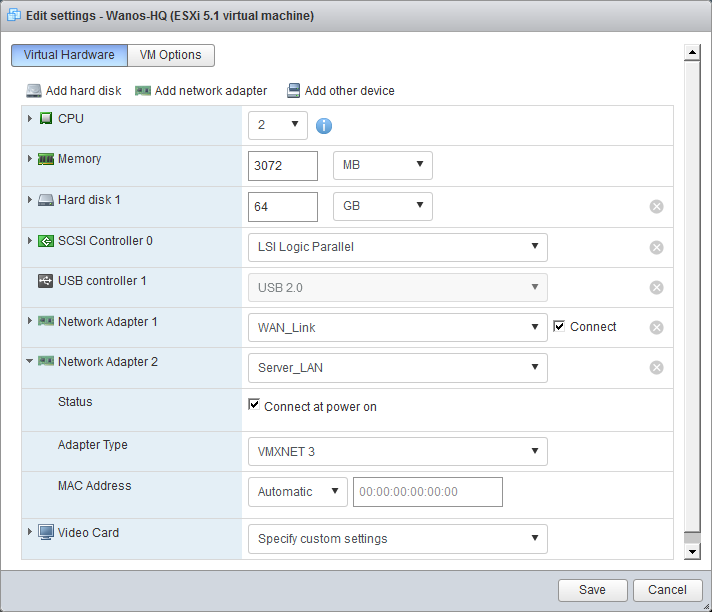
Based on the screenshot, Network 2 has the following:
Network Adapter 1: Server_LAN
Adapter Type: VMXNET 3
MAC Address: Automatic (administrators can assign a fixed MAC ID if required and if necessary)
IP Configuration
At this point, Wanos is installed and running.
Use a web browser to access the Web UI via https://192.168.1.200. If the network is on a different subnet, then, change the IP & Gateway information.
Once done, type the Username and Password to Login.
Update Software
Ensure to run the latest Wanos version. A step-by-step wanos update process guide is available.
License Activation
Unlock all Wanos features by activating a license. Please refer to the License Activation article. This step is also required for Trial use.
Username and Password
The login details for the Appliance and Web UI is in the Username and Password FAQ section.