
Contents
Create a USB bootable Wanos Appliance
Minimum of 16GB USB 2.0 Flash Drive. A blank or FAT32 formatted drive will do.
Hard Disk Drive with USB Enclosure as well as External USB Drives works as well.
Setting up a Wanos USB bootable Wanos Appliance in Windows
Here are two simple tools to write .img files on a Microsoft Windows Operating System: Win32 DiskImager and Rufus. These tools are adequate for casual use. For frequent use, advance disk cloning software is recommended e.g. Macrium Reflect Free, Symantec Norton Ghost or Clonezilla.
Steps on how to write an .img file to a USB flash drive using Win32 Disk Imager
1. Download Wanos Raw Disk Image on this link
2. Extract the the image from the zip file. (Ensure sufficient disk space is available)
3. Run Win32 Disk Imager. Select your USB Drive from the Device drop down box.

Screenshot
4. Click the Browse folder (Button with a folder icon), navigate to your extract .img file and click Open.

Screenshot
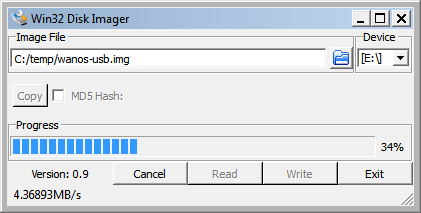
5. Click the Write button to proceed. You will be prompted at the end if the operation was successful.

Screenshot
Steps on how to write an .img file to a USB flash drive using Rufus.
1. Download Wanos Raw Disk Image on this link
2. Extract the the image from the zip file.
3. Run Rufus, select Create a bootable disk using DD Image and click the browse button to navigate to the .img file.

Screenshot
Extra Step when using USB HDD
Click on the down arrow button and tick on List USB Hard Drives.

Screenshot
4. Click the Start button to write the image. You will be prompted to Continue or Cancel. Select Continue to proceed.

Screenshot
Setting up a Wanos USB bootable Wanos Appliance in GNU/Linux
There are two recommended tools to write .img files on a GNU/Linux Operating Systems. Due to the fact the GNU/Linux distributions differ from one another, the steps on this how-to guide will focus on a GNU/Linux distribution called Mageia.
Not all GNU/Linux distributions have a built in GUI based zip extraction tool. A popular command line tool available in most distributions is p7zip. Here is an example of a p7zip command. Kindly adjust the syntax below on your preferred distribution. Assuming that your current directory is where your compressed wanos image file is located.
p7zip e wanos-2.0.5-img.zip
Steps on how to write an .img file to a USB flash drive using DD.
Please note that certain commands may require you to use su or sudo in order for these commands to run.
1. Download Wanos Raw Disk Image on this link
2. Extract the the image from the zip file.
Optional Step:
-Open a terminal command and type the following command:
fdisk -l
This will help you determine your USB device. The information below is an example of an output
/dev/sda: 149.1 GiB, 160041885696 bytes, 312581808 sectors
Units: sectors of 1 * 512 = 512 bytes
Sector size (logical/physical): 512 bytes / 512 bytes
I/O size (minimum/optimal): 512 bytes / 512 bytes
Disklabel type: dos
Disk identifier: 0x0003d2da
Device Boot Start End Blocks Id System
/dev/sda1 * 2048 206847 102400 7
HPFS/NTFS/exFAT/dev/sda2 206848 156291071 78042112 7
HPFS/NTFS/exFAT/dev/sda3 156293109 312580799 78143845 5
Extended/dev/sda5 156293120 157334687 520784 83
Linux/dev/sda6 157337600 188790335 15726368 83
Linux/dev/sda7 188792832 192981599 2094384 82
Linux swap / Solaris/dev/sda8 192985088 312580799 59797856 83
LinuxDisk /dev/sdb: 14.9 GiB, 16013852672 bytes, 31277056 sectors
Units: sectors of 1 * 512 = 512 bytes
Sector size (logical/physical): 512 bytes / 512 bytes
I/O size (minimum/optimal): 512 bytes / 512 bytes
Disklabel type: dos
Disk identifier: 0x00075208
3. Run this command. Assuming that your current directory is where your extracted wanos image file is located.
dd if="wanos-2.0.5.img" of=/dev/sdb
You should see a similar output once the extraction is complete.
14100+0 records in
14100+0 records out
14784921600 bytes (15 GB) copied, 2117.18 s, 7.0 MB/s
Steps on how to write an .img file to a USB flash drive using ImageWriter.
Several GNU/Linux distributions have this in their repositories
1. Download Wanos Raw Disk Image on this link
2. Extract the the image from the zip file.
3. Open a Terminal, run as root user
imagewriter
4. Click the Browse button and locate the extracted Wanos image file.

Screenshot
5. Click the dropdown box just beside the browse button and specify your USB Device.

Screenshot
6. Click Write to device to start proceed. A popup window appears once the operation is completed.

Screenshot
Summary
Linux: Assuming the destination USB/Compact Flash/Hard drive is /dev/sdb
dd if=wanos-usb.img of=/dev/sdb
To clone a live machine running from flash sdb to a physical disk sda:
/etc/init.d/wanosd stop-all
dd if=/dev/sdb of=/dev/sda
Windows users have the option of using the recommended free open source Win32 Disk Imager. Linux users can use the reliable open source dd version on the Linux command line.
Once the write completed successfully, Wanos is ready to boot from the USB, Compact Flash or HDD.
When a drive is moved between different appliances, a reset to defaults is recommended with ‘/etc/wanos/clean.sh’.
After initial setup, testing and configuration, clear the datastore on all devices.